Table of Contents
A microwave is one of those appliances that makes life easier every single day, which is exactly why it gets dirty so quickly.
Soup splatters. Sauce pops. Butter explodes. Leftover steam condenses on the walls. And somehow, even when you try to be careful, the inside still ends up with dried-on spots that seem to appear overnight.
That was the moment I stopped pretending microwave cleaning could be ignored for long.
Because a dirty microwave is not just an eyesore. It starts to smell. It can make reheated food taste a little off. And once the mess dries and hardens, cleaning it becomes much more annoying than it needed to be.
That is where vinegar comes in.
Not as a miracle product. Not as some complicated cleaning trick. Just a simple, effective way to loosen grime without making the job harder than it should be.
And once I started using it regularly, cleaning the microwave stopped feeling like a frustrating chore and became one of the easiest things to do in the kitchen.
Why Vinegar Works So Well in a Microwave
The reason vinegar is so useful is simple:
steam + vinegar + heat = softened mess
When you heat a bowl of water with vinegar inside the microwave, the steam spreads through the interior and helps loosen dried food, grease, and sticky residue. That means you do not have to scrub nearly as much.
That matters because microwave messes are usually not the kind you can wipe away instantly. They dry fast and cling to surfaces, especially in corners or around the ceiling of the microwave where splatter is easy to miss.
Vinegar helps soften all of that.
It also helps reduce lingering odors, which is a big plus if the microwave has been used for strong-smelling foods like garlic, curry, fish, or leftover takeout that has been sitting a little too long.
The result is not just a cleaner microwave. It is a fresher one.
What Makes This Method So Useful
What I like about vinegar is that it keeps the process simple.
You do not need special sprays, expensive products, or anything complicated. The whole point is to use the microwave itself to help with the cleaning. Once the steam builds up inside, it does most of the hard work for you.
That makes this method especially helpful when:
- the microwave has dried splatters
- the inside smells stale
- you want a quick reset before guests arrive
- you have been putting off a deeper clean
- you need something practical and low-effort
It is one of those cleaning methods that feels almost too easy, which is usually a sign that it is actually worth doing.
The Basic Vinegar Cleaning Method
The simplest version of this method only needs a few things:
- a microwave-safe bowl
- water
- white vinegar
- a cloth or sponge
The exact ratio does not need to be perfect, but a common mix is equal parts water and vinegar.
The idea is not to flood the microwave with liquid. It is to create steam that can loosen the stuck-on mess.
Here is the basic process:
- Fill a microwave-safe bowl with water and vinegar.
- Place it inside the microwave.
- Heat it long enough to create steam.
- Let it sit for a minute or two after heating.
- Carefully remove the bowl.
- Wipe down the interior with a cloth or sponge.
That is the entire method in simple form.
And the best part is that once the residue softens, even dried splatter usually comes off with very little effort.
Why You Should Let the Steam Sit
One of the biggest mistakes people make is wiping too quickly.
The steam needs a moment to do its job.
If you open the door and start scrubbing instantly, the mess may still be too firm and sticky. But if you let the steam sit for a bit after heating, the softened residue becomes much easier to remove.
That pause matters.
It gives the vinegar time to work on the dried food and lets the inside of the microwave stay warm enough for the grime to loosen naturally.
That small waiting period is often what turns a frustrating cleaning session into a quick wipe-down.
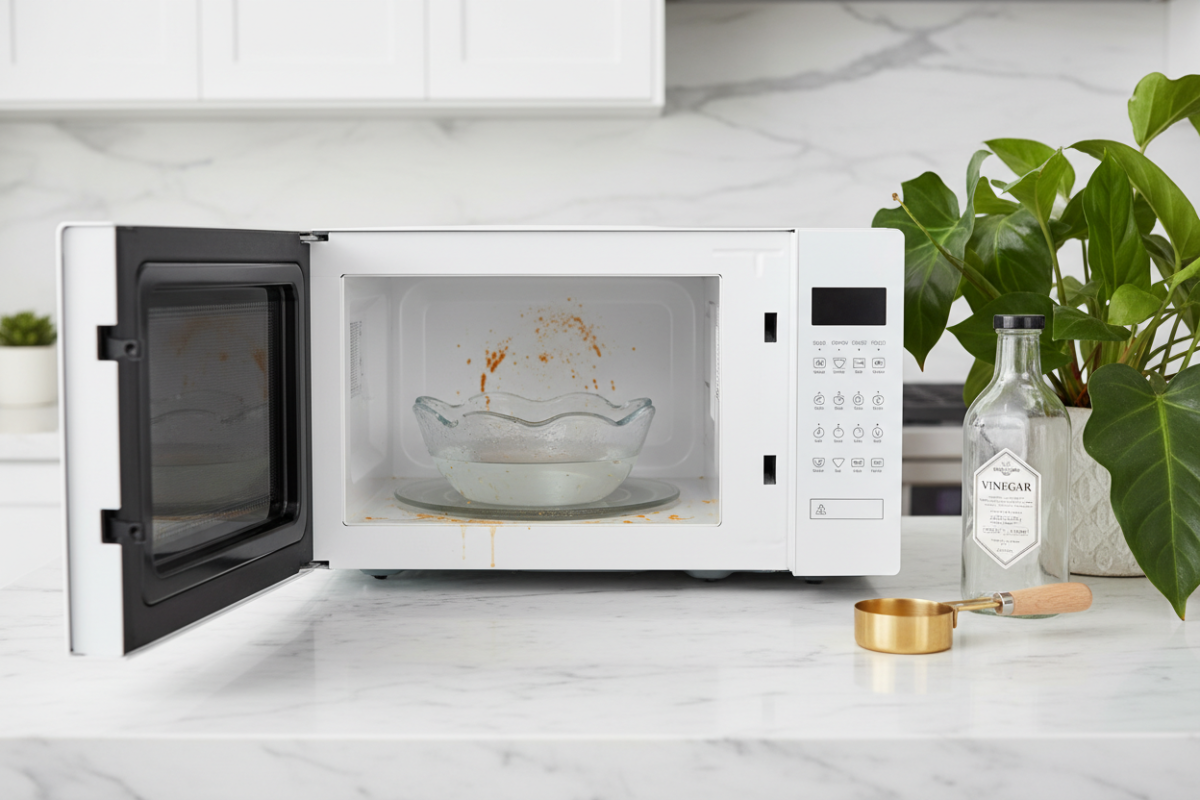
What the Microwave Usually Looks Like Before Cleaning
Microwave mess has a very specific personality.
It is usually not one giant spill. It is a cluster of tiny splatters in strange places.
You might find:
- dried sauce on the walls
- a greasy film on the ceiling
- crumbs in the corners
- sticky spots on the turntable
- food residue near the door edge
That is why vinegar works so well. It handles the kind of mess microwaves are known for.
And because the mess is often scattered, cleaning with steam is more efficient than trying to attack each spot dry from the beginning.
How Often to Clean the Microwave
A lot depends on how often it gets used, but the best habit is simple:
wipe it regularly and deep-clean it when splatter starts building up.
For many kitchens, a quick vinegar clean every one to two weeks is enough to keep things under control.
If you use the microwave heavily, or if you cook messy foods often, you may want to do it more frequently.
The key is not to wait until the microwave is visibly disgusting.
By then, the job takes longer than it should.
A little maintenance goes a long way here.
Why Dried Splatters Are Harder Than Fresh Ones
Fresh food splatter is easy.
Dried food splatter is the real problem.
Once the mess has sat long enough, it starts to harden and stick to the microwave surface. Heat alone can make it cling more firmly in some cases, especially if it has been baked on over time.
That is why the vinegar-steam method works so well.
It reverses some of that hardening by softening the residue first.
Instead of trying to scrape the mess off with pressure, you let heat and moisture do the loosening, then wipe it away gently.
That means less effort and less chance of scratching the surface.
The Areas That Need the Most Attention
Not every part of the microwave gets equally dirty.
The usual trouble spots are:
- the ceiling
- the side walls
- the turntable
- the door edge
- the door seal area
The ceiling is especially easy to forget because it is out of sight. But that is often where splatter accumulates the fastest.
The door edge and seal area also matter because food residue can hide there and create odors if it is left too long.
When cleaning, it helps to move methodically instead of wiping only the obvious spots.
What I Do Before Starting
Before cleaning, I always remove anything unnecessary from the microwave.
That means:
- take out the turntable if it is removable
- clear away loose crumbs
- make sure the microwave is off and safe to open
If the glass tray is dirty, I wash it separately so the main cleaning process is easier.
This makes the whole job smoother because you are not trying to clean around extra pieces.
Why a Gentle Cloth Matters
The microwave interior does not need aggressive scrubbing.
In fact, too much force can cause more harm than help.
A soft cloth or sponge is usually enough once the vinegar steam has done its work. That is especially important on painted or coated surfaces, where rough scrubbing can leave marks or wear the finish over time.
The goal is not to attack the surface.
The goal is to lift the mess away.
That is one reason this method is so useful. It relies on softening first, scrubbing later only if needed.
What to Do for Stubborn Spots
Sometimes the steam loosens most of the mess, but a few stubborn spots remain.
That is normal.
When that happens, I usually repeat the wipe once more instead of immediately reaching for something harsher.
If needed, I dip the cloth into the warm vinegar solution and gently work on the area again.
The point is to stay patient.
A little more steam, a little more wiping, and the spot usually gives up.
That is much better than using strong cleaners that can leave a smell or residue behind.
How Vinegar Helps with Odors
One of the biggest bonuses of this method is that it does not just clean visible mess. It also helps with smell.
Microwaves can hold onto odors from:
- fish
- cheese
- garlic
- curry
- burnt popcorn
- reheated leftovers
Once those smells settle in, they can linger every time you open the door.
Vinegar helps cut through that stale smell and leaves the microwave feeling fresher.
It is not trying to perfume the air. It just helps remove the source of the odor.
That is a much better result.
What Not to Do
There are a few things I would avoid when cleaning a microwave with vinegar.
Do not use a bowl that is not microwave-safe
That can create a safety problem and ruin the bowl.
Do not overfill the container
You want steam, not a spill.
Do not use metal
That should go without saying, but it is worth repeating.
Do not scrub too hard
If the grime is stubborn, let the steam do more of the work.
Do not forget to dry it
After wiping, drying the inside leaves it looking cleaner and helps prevent lingering moisture.
These are small details, but they matter.
Why This Method Feels Satisfying
There is something especially satisfying about a microwave cleaning session that works.
You see the grime soften. You wipe once and watch the splatter disappear. The smell improves. The whole appliance looks brighter.
It feels efficient without being dramatic.
That is what makes vinegar such a popular cleaning choice for this job. It turns a gross little chore into something simple and manageable.
And that matters more than people think.
Because the easier a cleaning method is, the more likely you are to keep using it.
A Good Habit for Busy Kitchens
If your kitchen gets a lot of use, the microwave probably gets dirty constantly.
That is why this cleaning method works best when it becomes part of a regular rhythm.
For example:
- wipe small splatters quickly after cooking
- do a vinegar steam clean when buildup starts
- deep clean if odors or dried stains build up
That routine keeps the microwave from reaching the “how did it get this bad” stage.
And that stage is usually where cleaning starts feeling like a big task instead of a small one.
A Simple Way to Prevent Future Mess
Cleaning is easier when you reduce the mess before it starts.
A few small habits help a lot:
- cover food before reheating
- use a microwave-safe lid or plate cover
- wipe fresh splatters right away
- avoid letting spills dry for days
That is where the real convenience comes from.
The cleaner you keep it between deep cleans, the less work the vinegar method has to do.
What a Clean Microwave Changes
A clean microwave is one of those small things that improves the whole kitchen.
It makes the appliance look newer. It smells better. It feels less grimy when you open it. And reheating food becomes more pleasant because you are not dealing with old residue or weird odors every time.
That is why it is worth keeping up with.
It is not just about appearance. It is about the overall feeling of the space.
Final Thoughts
Cleaning a microwave with vinegar works because it is simple, effective, and easy to repeat.
It softens stuck-on food. It helps with odors. It reduces the need for harsh scrubbing. And it fits naturally into a normal kitchen cleaning routine.
The main thing to remember is this:
the sooner you clean it, the easier it is.
That is really the whole secret.
A little vinegar, a little steam, and a little consistency can keep the microwave looking and smelling much better with very little effort.
And once you get used to it, it becomes one of those cleaning tasks you barely have to think about anymore.
Just heat, wipe, and move on.