Table of Contents
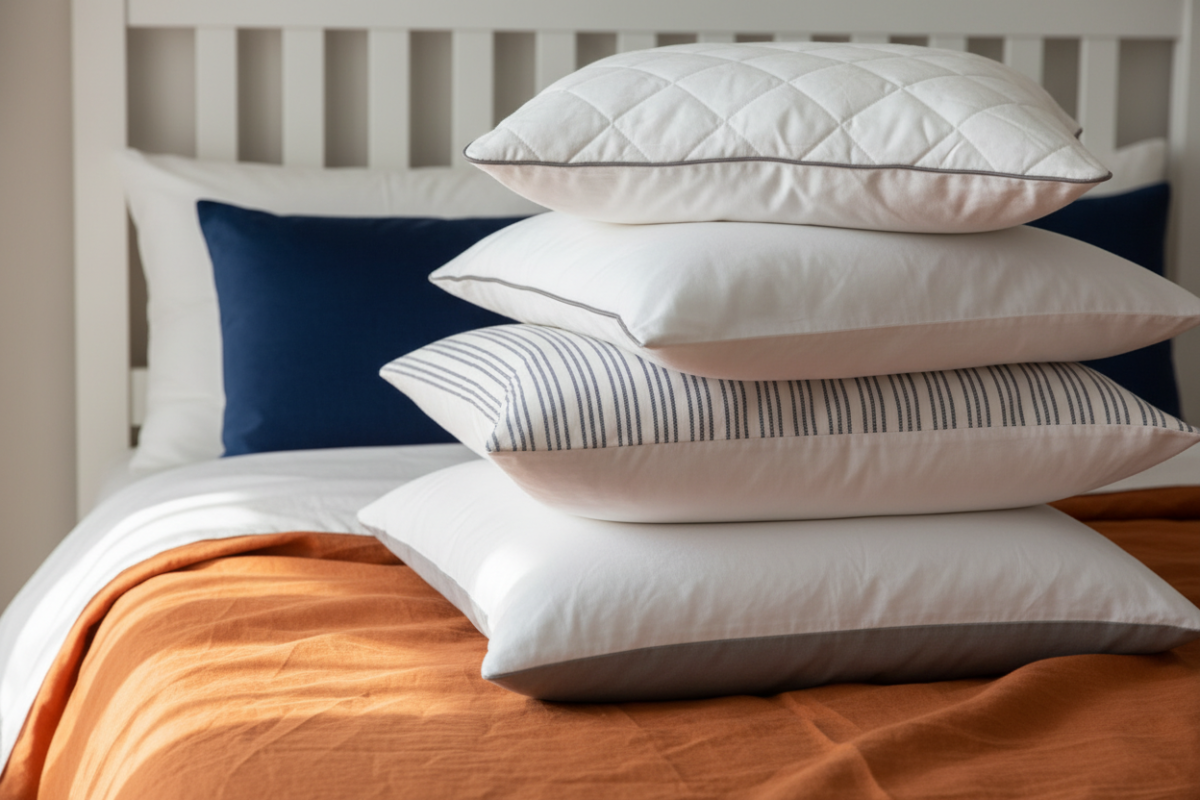
Pillows are easy to forget about.
They sit there every night, quietly collecting everything that comes with daily life: sweat, body oils, dust, drool, dead skin, and whatever else settles into fabric over time. Because pillowcases get changed more often, it is easy to assume the pillow itself is still clean enough.
That assumption usually lasts until the first time you take a closer look.
A pillow can look fine on the outside and still feel tired, flat, and a little off. It may have faint yellowing, a stale smell, or just that “not fresh anymore” feeling that is hard to describe but impossible to ignore once you notice it.
That was the moment I realized something simple:
a pillow can be covered, used, and washed around for years without ever actually feeling clean again.
And that is where a deeper cleaning method matters.
Baking soda and hydrogen peroxide are two ingredients that can make a surprising difference when used the right way. They help lift stains, break down grime, and freshen fabric without turning the whole job into a complicated project. The process is not difficult, but it does work best when you understand what the ingredients are doing and how to use them carefully.
Once I started treating pillows as something that needed real maintenance, not just a pillowcase swap, the bed felt fresher, the pillows looked better, and the whole room felt more put together.
Why Pillows Need More Than a Pillowcase Wash
Most people wash pillowcases regularly, which is good. But pillowcases only protect the surface. They do not stop everything from reaching the pillow underneath.
Over time, pillows absorb:
- sweat
- body oils
- saliva
- dust
- skin particles
- moisture from the air
That means the pillow itself slowly changes, even if it never gets visibly dirty in the way a shirt or towel does.
The problem is that this buildup happens gradually. You do not usually notice it after one week or even one month. It takes time. Then one day the pillow starts looking dull, smelling slightly stale, or feeling less comfortable than it used to.
That is usually when people realize the pillow needs more than a quick fluff.
A proper cleaning can help restore freshness, remove buildup, and make the bed feel much cleaner overall.
Why Baking Soda and Hydrogen Peroxide Work So Well
This combination is popular for a reason.
Baking soda helps absorb odors and loosen surface buildup. It also gives a gentle scrubbing effect without being too harsh on fabric when used correctly.
Hydrogen peroxide helps lift stains and brighten fabric. It is especially useful for those yellowed areas that can develop over time on pillows.
Together, they create a cleaner, fresher result than water alone.
The important thing is not to think of them as magic. They are practical cleaning ingredients. They work because they tackle the main problems pillows tend to have: odor, discoloration, and grime.
That is what makes this method so useful.
Before You Start: Check the Pillow Type
This matters more than people think.
Not every pillow should be cleaned the same way.
Some pillows can handle moisture and cleaning solutions better than others. Others are more delicate and should be cleaned with more care.
Before using baking soda and hydrogen peroxide, check:
- the care label
- the fill material
- whether the pillow is memory foam, down, or synthetic
A lot of standard bed pillows can be cleaned with this method, but certain materials may need gentler handling.
For example, memory foam is usually not meant to be soaked heavily, while many polyester or synthetic pillows can tolerate more general cleaning methods.
Taking one minute to check the label can save a lot of trouble later.
What You Need
The process does not require a long shopping list.
Usually, you only need:
- baking soda
- hydrogen peroxide
- warm water
- a clean cloth or sponge
- a soft brush if needed
- a laundry-safe pillow or a pillow that can be cleaned by hand
Some people also like to use mild dish soap, depending on the condition of the pillow. But the basic method can work with just the main ingredients.
The goal is to keep things simple enough that you will actually do it.
Step 1: Remove the Pillowcase and Check the Pillow
Start with the obvious but important first step.
Remove the pillowcase and any protective cover. Then look at the pillow itself.
You are checking for:
- yellow stains
- dark spots
- odors
- areas that feel damp or clumped
This gives you an idea of how much cleaning is needed.
A lightly worn pillow may only need surface cleaning and deodorizing. A pillow with visible staining may need a more focused treatment. A pillow that feels damp, musty, or damaged may need more than a basic refresh.
This step helps you avoid guessing.
Step 2: Pre-Treat the Stained Areas
If you can see yellowing or spots, pre-treat those areas first.
Mix a small amount of hydrogen peroxide with a little baking soda to form a paste or a light cleaning solution, depending on how thick you want it.
Apply it gently to the stained areas using a cloth, sponge, or soft brush.
Do not scrub too aggressively.
The goal is to loosen the stain, not wear down the fabric.
Let it sit for a few minutes so the ingredients can work before wiping or rinsing.
This is the part that often makes the biggest visual difference.
Step 3: Clean the Pillow Surface
Once the stained areas have been treated, go over the rest of the pillow surface.
Use a cloth lightly dampened with the cleaning mixture or a gentle baking soda solution. Work in sections so you do not miss spots.
Focus on areas that get the most contact:
- the center
- the side where your head rests
- any visible edge discoloration
You do not need to soak the pillow to get results.
In fact, using too much liquid can make drying take longer than necessary.
A careful, even application usually works better than a heavy-handed one.
Step 4: Let the Ingredients Sit
This part is easy to skip, but it matters.
After applying the cleaning mixture, give it time.
Baking soda needs a little time to absorb odors and loosen buildup. Hydrogen peroxide needs a little time to brighten and lift stains.
A few minutes of waiting can make the cleaning much more effective.
Rushing through the process usually means you have to repeat it later.
Step 5: Wipe or Rinse Carefully
After the solution has had time to work, remove the residue.
Depending on the pillow type, that may mean:
- wiping with a clean damp cloth
- rinsing carefully with water
- gently blotting away excess moisture
The key is to remove both the cleaning mixture and the loosened grime.
Do not leave the fabric overly wet if you can avoid it. Moisture that stays trapped in a pillow can create a new problem, which defeats the whole purpose of cleaning it.
This part should feel like clearing away the old layer so the pillow can dry fresh and clean.
Step 6: Dry It Thoroughly
This is one of the most important steps.
A pillow may look clean before it is actually dry.
If it stays damp too long, it can develop a musty smell or even create the kind of environment where mold becomes a concern.
So make drying a priority.
The best options are:
- air drying in a well-ventilated area
- placing it somewhere with indirect sunlight if appropriate
- turning the pillow occasionally so both sides dry evenly
If the pillow is machine-safe and the care label allows it, some people finish with a low heat drying cycle. But only do that if the pillow type supports it.
The goal is full dryness, not just surface dryness.
Why Yellowing Happens in the First Place
A lot of people assume yellow stains mean a pillow is ruined.
That is not always true.
Yellowing usually happens because of:
- body oils
- sweat
- moisture over time
- general aging of the fabric
It is normal in the sense that it is common, but that does not mean it has to stay that way.
A good cleaning can often brighten the fabric noticeably, especially if the stain has not been there for years.
The earlier you clean it, the better the result usually is.
What This Method Helps With Most
This approach is especially useful if your pillow has:
- surface stains
- yellowing
- stale odors
- general dullness
- a not-quite-fresh feeling
It is not necessarily a cure for every pillow problem, but it is a very effective reset.
Sometimes that is all a pillow needs.
Not replacement. Just proper cleaning.
That difference matters because people throw out pillows too quickly when they might still have more life left in them.
When a Pillow Should Probably Be Replaced
Cleaning can do a lot, but not everything.
At some point, a pillow stops being worth saving.
That might be the case if it has:
- deep structural damage
- permanent odor
- clumped or broken fill
- flattening that does not improve
- persistent staining even after cleaning
A pillow is supposed to support sleep, not make you wonder whether it has seen better days.
If the shape is gone or the material is deteriorating, cleaning may improve it, but it will not completely fix it.
That is when replacement becomes the better option.
A Simple Routine That Keeps Pillows Fresher Longer
The best way to keep pillows clean is not to wait too long between deep cleans.
A simple routine helps a lot.
That can include:
- washing pillowcases regularly
- using pillow protectors
- fluffing pillows often
- airing them out occasionally
- deep cleaning when discoloration starts to appear
This is one of those maintenance habits that saves time later.
A pillow that gets regular attention stays fresher, smells better, and lasts longer.
What Makes This Method So Useful
The real appeal of baking soda and hydrogen peroxide is that the method is practical.
It is not fancy. It is not difficult. It does not require a huge setup.
But it addresses the exact issues most pillows develop over time.
- Baking soda helps with odor.
- Hydrogen peroxide helps with stains.
- Gentle cleaning helps preserve the pillow.
That combination is simple enough to repeat, which is exactly why it works so well.
A cleaning method only matters if it is easy enough to use again next month.
The Difference You Notice After Cleaning
The first thing you usually notice is the smell.
A clean pillow smells lighter, fresher, and less stale.
Then you notice the appearance.
The yellowing often looks softer or less obvious. The fabric can look brighter. The bed itself feels more inviting.
That is the part people forget.
A fresh pillow does not just help hygiene. It changes how the whole bed feels.
And when the bed feels clean, the room feels calmer too.
A Small Habit That Makes a Big Difference
One of the easiest ways to keep pillows cleaner is to pay attention before buildup gets bad.
If you wait until the pillow is heavily stained, cleaning takes more effort.
If you clean it when the yellowing is just starting, the result is usually better and faster.
That simple timing shift makes a huge difference.
The same applies to many things in the home.
Maintenance is easier than rescue.
Final Thoughts
Cleaning pillows with baking soda and hydrogen peroxide is one of those tasks that sounds more involved than it really is.
Once you break it into steps, it becomes manageable:
- check the pillow type
- pre-treat stains
- clean the surface
- let the ingredients work
- rinse or wipe carefully
- dry thoroughly
The result is a pillow that feels fresher, looks better, and makes the bed feel more comfortable overall.
That is really the goal.
Not perfection. Just a cleaner place to sleep.
And honestly, once you have done it once, it becomes one of those small home care habits that feels worth repeating.